Interactive Web Page Demo with Javascript
This exercise borrowed from Mozilla's Javascript and DOM documentation (here).
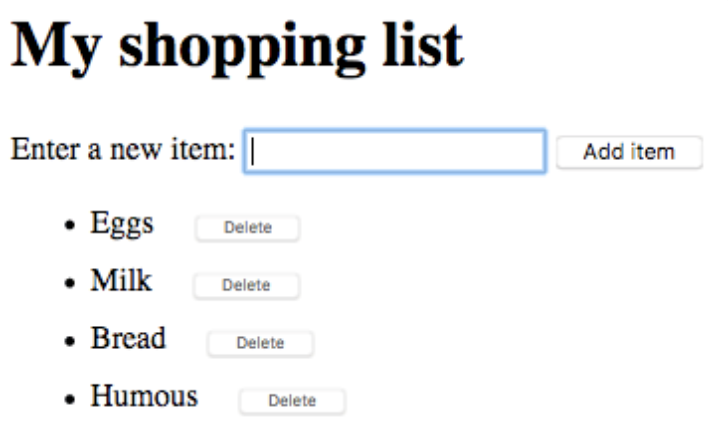
In this challenge we want to make a simple shopping list example that allows you to dynamically add items to the list using a form input and button. When you add an item to the input and press the button:
The item should appear in the list.
Each item should be given a button that can be pressed to delete that item off the list.
The input should be emptied and focused ready for you to enter another item.
The finished demo will look something like this:
To complete the exercise, follow the steps below, and make sure that the list behaves as described above.
- To start with, we will use the HTML starter code below. You'll see that it has a div with a label, input, and button, and an empty list and <script> element. You'll be making all your additions inside the script.
- Create three variables that hold references to the list (<ul>), <input>, and <button> elements.
- Create a function that will run in response to the button being clicked.
- Inside the function body, start off by storing the current value of the input element in a variable.
- Next, empty the input element by setting its value to an empty string — ''.
- Create three new elements — a list item (<li>), <span>, and <button>, and store them in variables.
- Append the span and the button as children of the list item.
- Set the text content of the span to the input element value you saved earlier, and the text content of the button to 'Delete'.
- Append the list item as a child of the list.
- Attach an event handler to the delete button so that, when clicked, it will delete the entire list item (<li>...</li>).
- Finally, use the
focus()method to focus the input element ready for entering the next shopping list item.
<!DOCTYPE html>
<html lang="en-us">
    <head>
    <meta charset="utf-8">
    <meta name="viewport" content="width=device-width, initial-scale=1.0">
    <title>Shopping list example</title>
    <style>
        li {
        margin-bottom: 10px;
        }

        li button {
        font-size: 8px;
        margin-left: 20px;
        color: #666;
        }
    </style>
    </head>
    <body>

    <h1>My shopping list</h1>

    <div>
        <label for="item">Enter a new item:</label>
        <input type="text" name="item" id="item">
        <button>Add item</button>
    </div>

    <ul>

    </ul>

    <script>

    </script>
    </body>
</html>
In the end, the shopping list should look like this.
Here is an example of what the code should look like after following the above steps:
<!DOCTYPE html>
<html lang="en-us">
    <head>
    <meta charset="utf-8">
    <meta name="viewport" content="width=device-width, initial-scale=1.0">
    <title>Shopping list example</title>
    <style>
        li {
        margin-bottom: 10px;
        }

        li button {
        font-size: 12px;
        margin-left: 20px;
        color: #666;
        }
    </style>
    </head>
    <body>

    <h1>My shopping list</h1>

    <div>
        <label for="item">Enter a new item:</label>
        <input type="text" name="item" id="item">
        <button>Add item</button>
    </div>

    <ul>

    </ul>

    <script>
        const list = document.querySelector('ul');
        const input = document.querySelector('input');
        const button = document.querySelector('button');

        button.addEventListener('click', () => {
        const myItem = input.value;
        input.value = '';

        const listItem = document.createElement('li');
        const listText = document.createElement('span');
        const listBtn = document.createElement('button');

        listItem.appendChild(listText);
        listText.textContent = myItem;
        listItem.appendChild(listBtn);
        listBtn.textContent = 'Delete';
        list.appendChild(listItem);

        listBtn.addEventListener('click', () => {
            list.removeChild(listItem);
        });

        input.focus();
        });
    </script>
    </body>
</html>
Event Handlers
Event handlers are mentioned above, and these are an important part of any interactive web page.
To understand event handlers, we should first understand events. Events are things that happen in the system you are programming, which the system tells you about so your code can react to them. For example, if the user clicks a button on a webpage, you might want to react to that action by displaying an information box.
To react to an event, you attach an event handler to it. This is a block of code (usually a JavaScript function that you as a programmer create) that runs when the event fires. When such a block of code is defined to run in response to an event, we say we are registering an event handler. Note: Event handlers are sometimes called event listeners — they are pretty much interchangeable for our purposes, although strictly speaking, they work together.
One important event handler that we will use in this course waits for the page to fully load before running any kind of Javascript (can you guess why this is important?). To do this, use the DOMContentLoaded event listener. Here is an example in code:
document.addEventListener('DOMContentLoaded', function() {
    // This code will run when the DOM is fully loaded and ready.

    // You can perform various operations on the DOM here.

    // You can also add more event listeners or manipulate other elements on the page.
});